Rose's Ragout:  quick, healthy & delicious
  • Blog
  • About
  • Recipes
    • Banana Oatmeal Bread
    • Basil Walnut Pesto
    • Bison Burger
    • Broccoli and Garlic
    • Bruschetta Sandwich
    • Butternut Squash Soup
    • Chocolate Cinnamon Banana Oatmeal
    • Chocolate-Pumpkin Bread
    • Egg in a Tomato
    • Flax Seed Bread
    • Garlic Spread
    • Grilled Corn
    • Italian "Sloppy Joe" Sandwich
    • Kale Chips
    • Ovaltine Iced Mocha
    • Parmesan, Garlic & Herb Quick Bread
    • Pizza Crust (Whole Wheat)
    • Pumpkin Cornbread (savory)
    • Pumpkin Pizza with Kale and Bacon
    • Purple Potato and String Bean Salad
    • Sweet Potato, Brussels sprouts, and Kale Salad with Apple and Bacon
    • Sweet Potato and Black Bean Enchiladas with Kale and Goat Cheese (slow cooker)
    • Sweet Potato Drop Donut
    • Turkey and Red Wine Meatballs
    • Turkey Meat Sauce
    • Whole Wheat Pizza Dough
    • Zucchini Banana Muffins
  • What I Ate
  • Contact

Quick, HEalthy, Delicious

Butternut Squash and California Raisin Quinoa with Garbanzo Beans

12/6/2014

10 Comments

 
By posting this recipe I am entering a recipe contest sponsored by the California Raisin Marketing Board and am eligible to win prizes.  I was not compensated for my time.  This contest was facilitated by the RecipeRedux.  

I don't know about you, but this time of year, it's easy to get sick of the peppermint cookie this, and the cranberry stuffed that.  I want to eat something different with my holiday meals.  

Picture

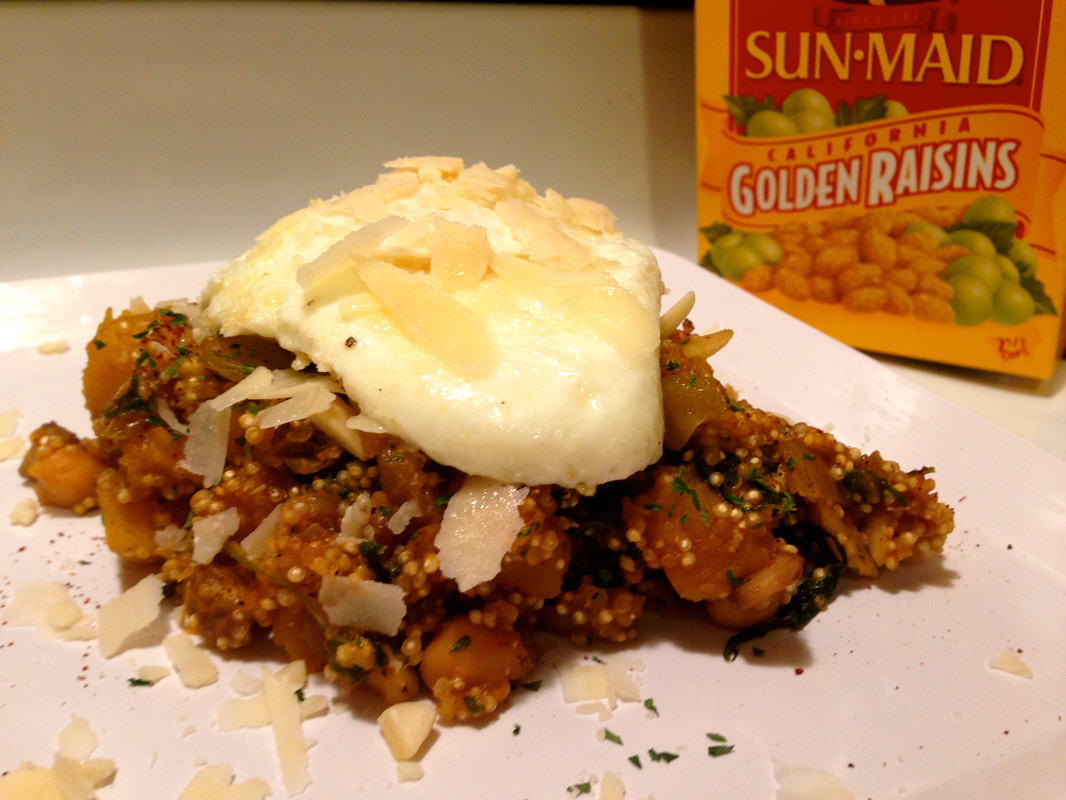
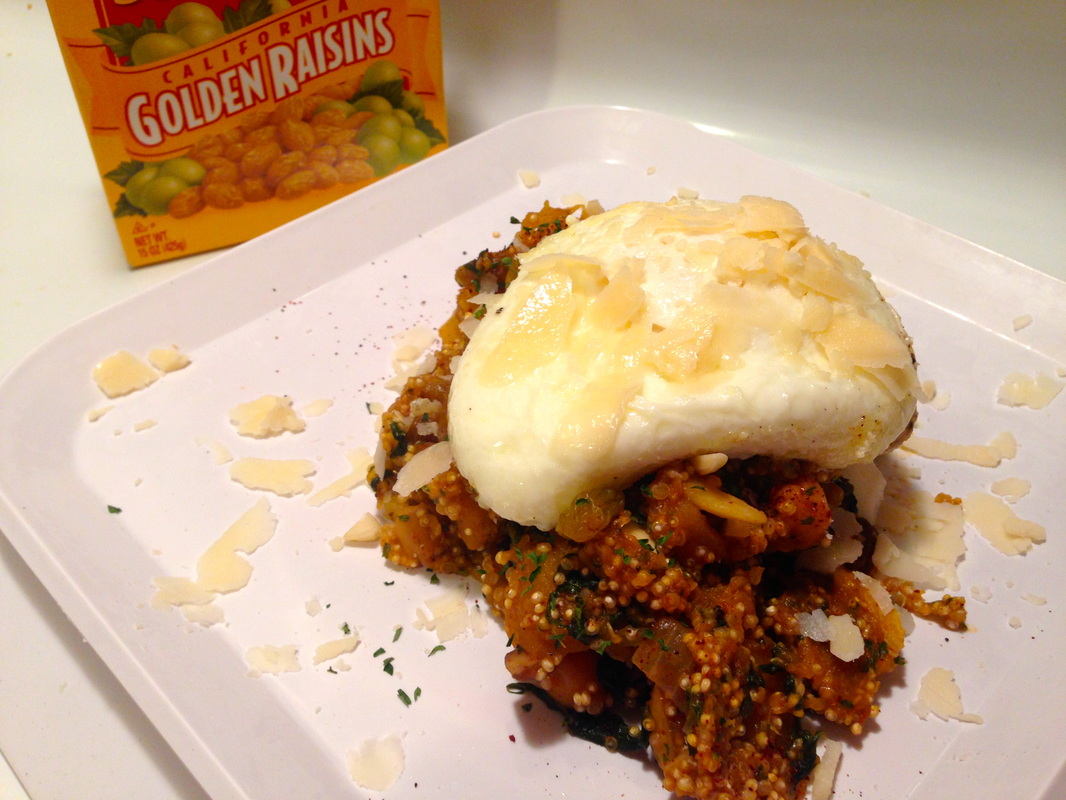
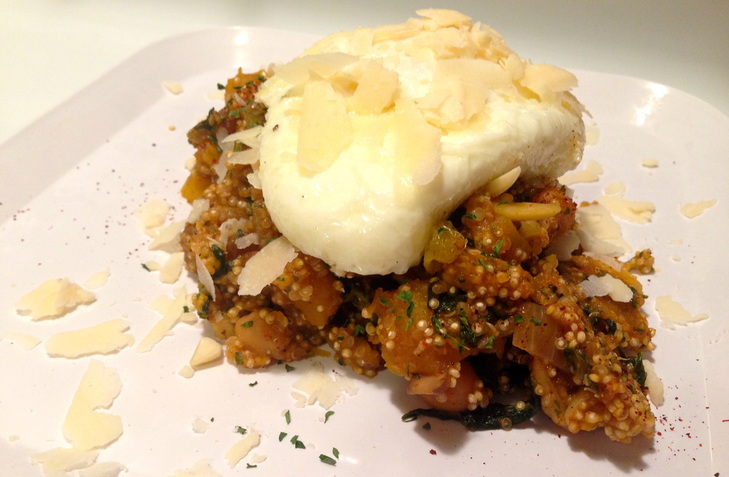
I think sweet and spicy is becoming one of my new go-to flavor combos.  Sweet squash scrambled with eggs, and topped with sriracha?  Check.  Spicy chocolate ice cream?  Okay!  A Starbucks gingerbread latte?  YES PLEASE.  Got it?  Sweet and spicy.  It works.  Now take plump, naturally sweetened California raisins and combine them with sweet and creamy squash, spicy kicked up quinoa and top with a fried egg.  Now we're talking.  

Picture

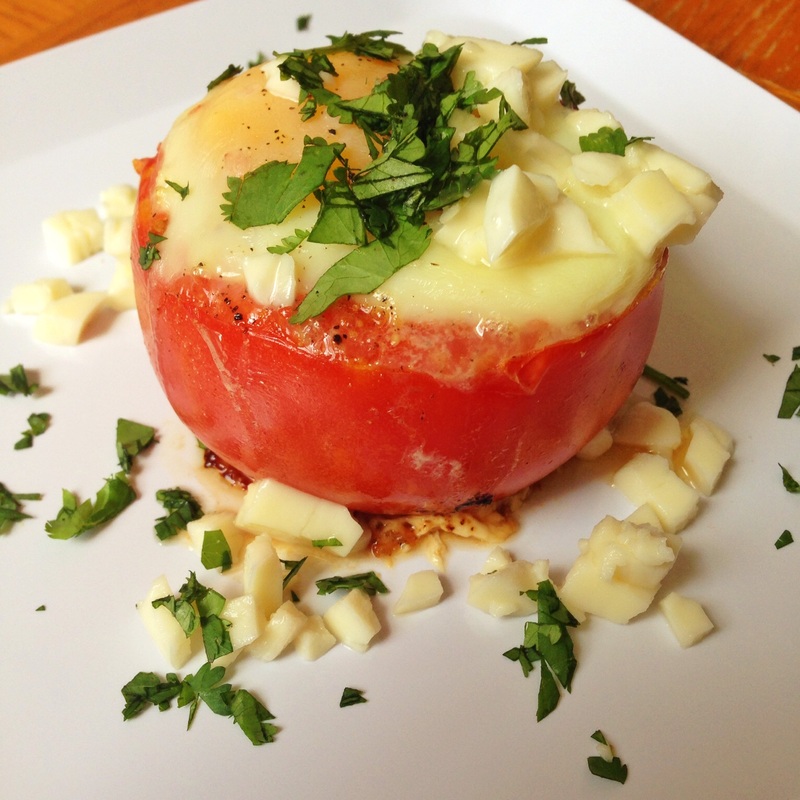
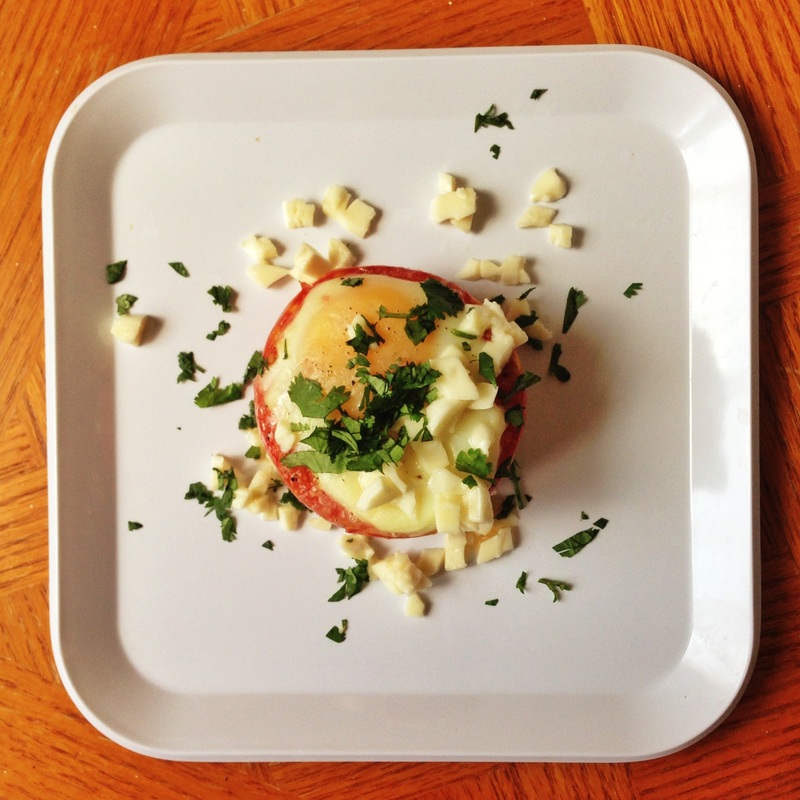
When I was visiting my family in Ohio over Thanksgiving, I went out with my siblings for brunch.  Who doesn't love brunch?  We went to this place that's locally owned and sources all of their food, you guessed it, locally.  It's called the Sleepy Bee.  Even Alton Brown loves it.  Anyway, brunching seemed to spark a lightbulb in my brother's head.  All of a sudden, he decided that I should go into business with him and open up an egg themed restaurant called Egg Place, but spelled "EggPlc." because apparently it's more hipster that way.  His theory was that everything tastes better with an egg on top.  He's not wrong.  You could change the lyrics to Beyonce's song and exclaim "If you like it then you better put an egg on it," and it would probably be true 90% of the time.

Picture

By default, I'm pretty sure any recipe that involves butternut squash automatically feels "Holiday."  I know you know what I mean.  Like squash soup.  It feels like fall and winter when I eat it.  And in my book, fall and winter are holidays.  Plus, food and holidays are supposed to bring back memories.  And butternut squash will always provide me with a bright and shiny holiday memory.  Thanksgiving 2012 people.  I think sweet and spicy means holiday too.  And since the sweet in this dish comes from the California raisins, it's a natural sweetness you can feel really good about.  So this dish is definitely holiday.  Got it?  And since the holiday's are always full of such heavy, decadent foods, it's the clear choice to enjoy a dish made with foods that are good for you, like squash and of course all-natural California raisins.  Plus, this dish is super budget friendly.  Fun fact:  did you know that according to the USDA, raisins are the most economical dried fruit?  So start saving those pennies for your holiday gifting because this dish won't be breaking the bank.  

Picture


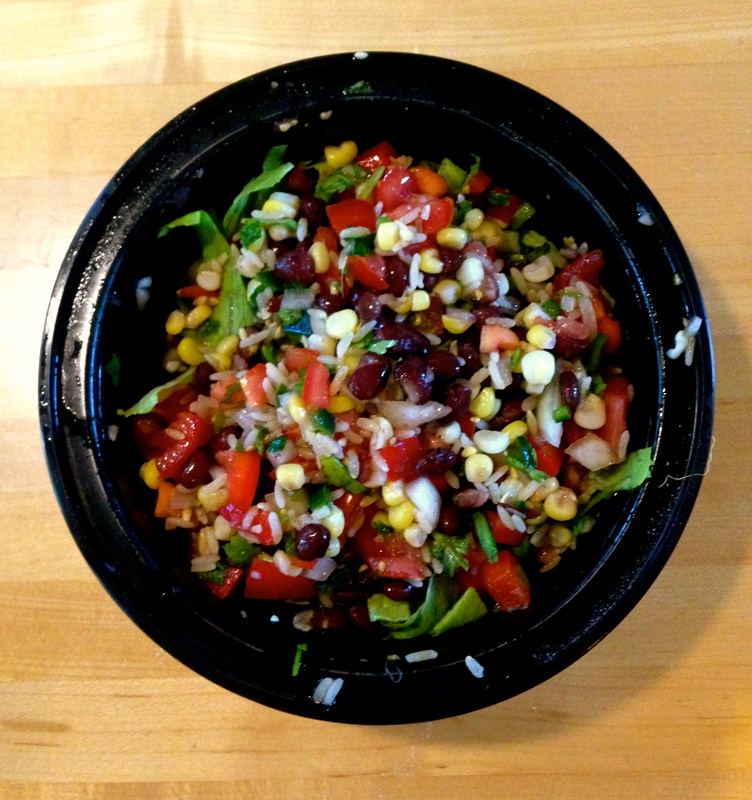
Butternut Squash and California Raisin Quinoa With Egg and Garbanzo Beans

yield:  12 servings

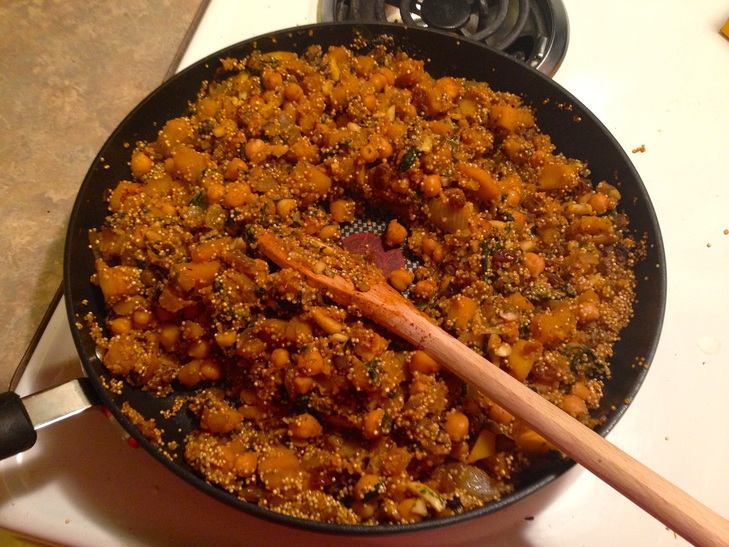
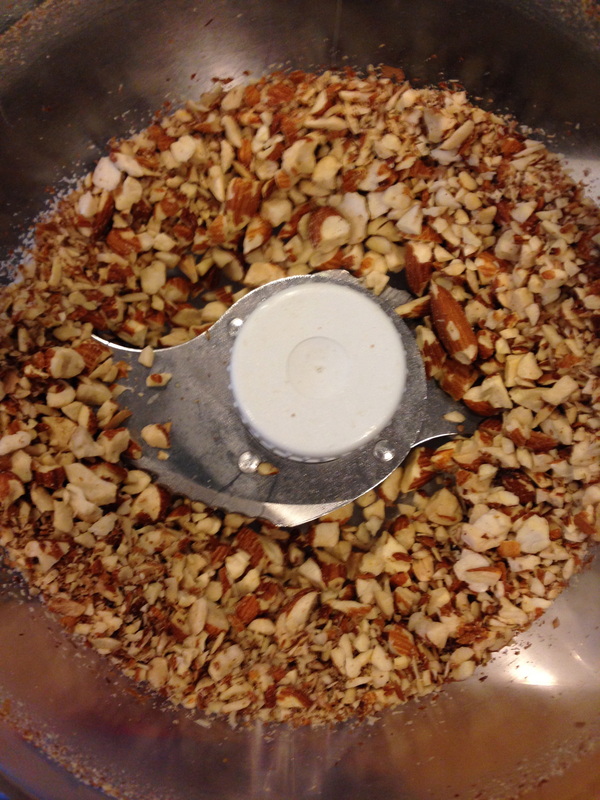
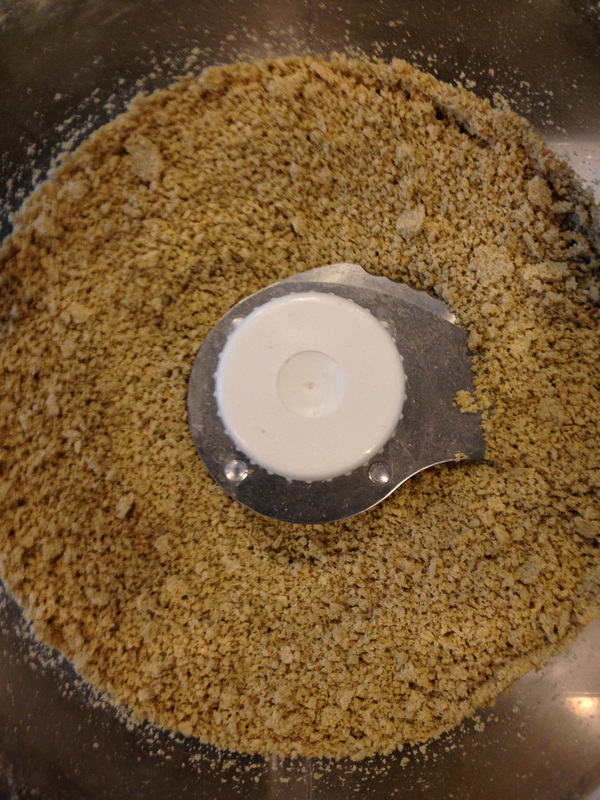
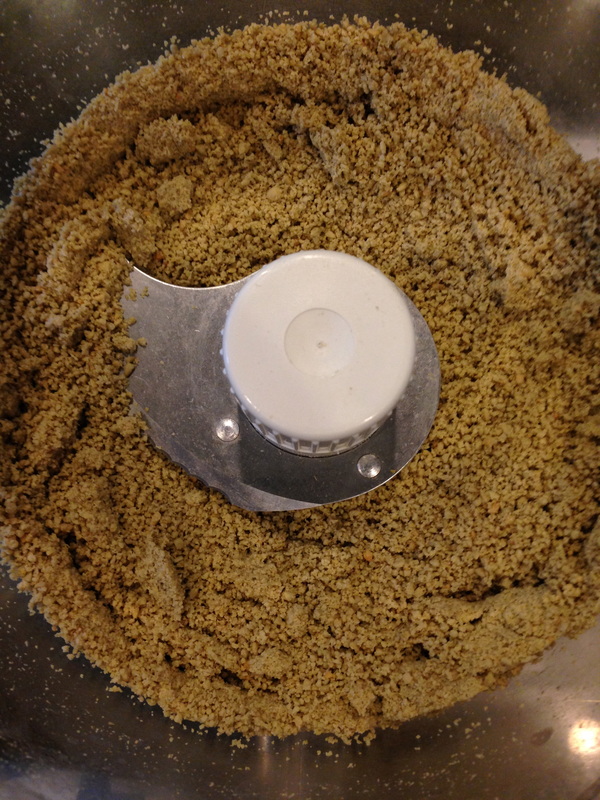
Ingredients:

1 tsp unsalted butter
2 tsp olive oil
1/2 cup shallots, minced
3 cups butternut squash, diced
2 cups crimini mushrooms, chopped
1/4 tsp cayenne pepper
2 cups kale, chopped
1 (15 oz) can garbanzo beans, drained and rinsed
1 cup (uncooked) quinoa
13/4 cup broth, boiling (veggie broth or chicken broth)
1/2 cup slivered almonds
1/2 cup golden California Raisins
1/4 cup flat leaf parsley, chopped
2 T fresh lemon juice

Optional Toppers:
shaved Parmesan cheese
over easy egg


Instructions:

Heat butter and oil in a large skillet over medium-high heat, stirring until butter melts.  Add shallots; cook 3 minutes or until soft, stirring occasionally.  Add the squash and mushrooms and cook until the squash is tender (7 - 8 minutes).  Add the kale and the garbanzo beans, stirring occasionally.  Add the quinoa and cook 1 minute, stirring constantly.  Stir in 1 3/4 cup broth and season with salt and pepper.  Reduce heat to simmer and cover for about 15 minutes, or until all liquid is absorbed and quinoa is cooked.  Mix with almonds, raisins, parsley and lemon juice.  Top each individual portion with a fried egg and some parmesan cheese.  

For more information about all-natural, no-sugar added California raisins and for recipe inspiration, please visit www.loveyourraisins.com, or get social with us at www.facebook.com/californiaraisins, www.pinterest.com/calraisins, or www.twitter.com/caraisins.

An InLinkz Link-up
10 Comments

Honey Mustard Chicken Thighs

11/11/2014

0 Comments

 
Just call me "Suzie Homemaker," I've been into roasting whole chickens lately, or in this case, chicken thighs.

Picture

I recently realized how cheap it is to buy a whole bird.  Like way cheap.  Like 99 cents a pound cheap.  And when the boneless skinless breasts are 2.99 / lb (sometimes more!), I feel lke I'm getting a steal because let's face it, a whole chicken, or a roast chicken thigh... it just sounds fancier.  I like it when things sound fancy.  Especially budget friendly things.

Picture

I'm not sure why, but you are guaranteed to grab my attention when the words "sale," "managers special," or any other discount related words are written on anything.  You could probably tell me the grocery store was having a sale and the little voice inside my head would tell me i'm getting a good deal.  I think that's why I like Black Friday so much.  I think at this point, I've realized that there isn't much being sold that is a good deal, but for some reason, I feel like I've struck gold with every purchase made on that silly shopping day.  Right now, I'm holding out for a deep fryer.  I'm sure I could buy a deep fryer today for the same price as the ones being sold on Black Friday, but something about waiting to buy it then, in a crowd of people at 3 AM seems more exciting.  My life could use some more excitement, so I will patiently wait to be excited about my not so great but really awesome deal.  I know you totally understand what I just said there.

Picture

When I think of fancy things, dinner parties, designer clothes and whole roasted birds come to mind.  This chicken comes in as a close second.  I don't know about you, but I'm all about the re-purposing.  I use the thigh meat here because let's face it, dark meat is delish.  I use skin on, bone in, because these two elements allow the chicken to be flavorful and moist after roasting.  And honey mustard?  Who doesn't love honey mustard.  If you say you, picture me staring you down right now.  Ok? Cool.  

Picture

So here's your plan.  You're going to roast off more of these little guys then you plan on eating.  You're going to remove the skin from the leftovers and shred the leftover meat and eat it on things like salads and in quesadillas all week long.  Because who doesn't love quesadillas?  You're welcome.


Honey Mustard Chicken Thighs


INGREDIENTS:

4 bone-in, skin-on chicken thighs
3 tablespoons olive oil
1 lemon, juiced
2 tsp poultry seasoning
Salt and Pepepr
1 T brown mustard
1-2 T honey

INSTRUCTIONS:


Preheat oven to 375 F.  Toss chicken in olive oil, lemon juice, poultry seasoning, salt and pepper.  Roast chicken skin side down in an oiled roasting pan.  Allow to roast for 20-25 minutes skin side down.  Flip chicken over and allow to roast for 10-15 more minutes.  Combine the honey and mustard in a bowl and brush over chicken.  Turn the oven on broil and put chicken back in.  Allow the chicken skin to crisp up, about 5 minutes.  Serve warm!

0 Comments

#PizzaNight- Utilizing Leftovers To Add A Mushroom Twist On My Pumpkin Pizza

9/14/2014

0 Comments

 
I've been watching a lot of Chopped lately.  Food Network has been airing the leftovers series.  I think it's funny when the contestants find out they are cooking with leftovers.  They get mad and say things like, "I never eat leftovers," or "Leftovers are gross."  That makes me sad.  Leftovers are a beautiful thing.   I get excited about leftovers.  Yum.

Picture
Last night, I was working on some reading for graduate school.  Since it was Saturday night, I felt like I should at least go someplace to read instead of locking myself in my apartment.  Because that's depressing.  I went with a friend to Starbucks and witnessed maybe one of the greatest moments ever.  A group of about 10 "frat bros" came in and got an assortment of drinks.  The two guys who ordered Frappicunos were really excited.  They clinked their cups together and exclaimed, "We are Frappucino bros!"  I hope that someday, people will get that excited about leftovers.  Maybe frat guys will want to be "Leftovers Bros."  I'm not sure that makes sense... but it could become a thing.  


I think people who don't eat leftovers are missing out on life.  Leftover soup tastes better the next day.  Leftover cold pizza is delicious for lunch.  Using leftover ingredients saves money, and everybody wants to save money.  Am I right?  I made my pumpkin pizza on my whole wheat crust again today since I still had ricotta, pumpkin, kale, and bacon in my fridge from when I made it last week.  I also had leftover pizza dough.  It was meant to happen.  I also had leftover baby bella mushrooms from another recipe I made earlier in the week, so I cooked those off in the bacon fat after rendering my bacon for this pizza.  It was a very welcomed addition to my pizza.  


Happy Sunday, have fun using your leftovers, and most importantly, eat Pizza (because it's Sunday--reference here for why Sunday is Pizza Night).  
0 Comments

Pumpkin Cornbread... and the "unofficial" Start to Fall

9/1/2014

0 Comments

 
Now, before I really get started, I want to point out that as I sit here and type this post, it's 84 degrees F and humid here in Peoria, and my AC does not work properly and I'm sitting here sweating in my apartment.  Now that you have that picture in your head, it's had to believe that this post is about FALL.  Yes, I went there.  I'm a HUGE proponent of the notion that fall food only tastes good when it's actually fall (I stand by that opinion, now and forever).  When you have a cool, crisp, autumn breeze, the crunching of the leaves, and of course the hues of orange and red--that is when it's fall--that is when fall food is most delicious and most comforting.  Not August 25, when Dairy Queen and Starbucks decided to release their fall favorites.  Seasonally speaking, the official end to summer and start of autumn isn't until September 22!  However, seeing all the fall decorations, menu  items, and of course CANDY CORN all over town got fall on my mind early.  I've been telling myself that I wouldn't cave and I would wait until it actually felt like fall outside, but alas, I succumbed to the peer pressure, and here I am, on September 1st, developing a recipe that's all about that season that hasn't happened yet.  But September sounds more like autumn than August, so I'm just gonna go with it.  Besides, those who know me best know that I get giddy just thinking about foods made with apple cider, pumpkin, and all the other fall staples.  

Picture

So you can thank my good pal Molly for this post because she kind of inspired the idea.  That, and I've been looking for some savory applications of pumpkin for entering a recipe contest, so this seemed perfect.  After an afternoon of messing around with ratios and comparing other standard cornbread recipes, I think I've developed a winner.  Let's just say my kitchen smells AMAZING.  It's definitely a savory cornbread.  It's slightly sweet, and slightly salty, with just the right amount of cinnamon, ginger, and nutmeg for that fall spice your senses crave.  It's moist in the center and crisp and golden brown on top.  It's so easy to make, requires ingredients that most people typically have at home, and most importantly, takes 30-35 minutes, TOPS.  I'm all about the quick (hello! Quick, healthy, delicious is my blog name...).  Baking in 30 minutes?  COUNT ME IN.  

Picture

Pictured above are most of the ingredients.  When I bake, I always like to do a mixture of whole wheat and white flours--I think that's the future dietitian in me.  Extra fiber, ya know??  The oil is necessary (for all you health nuts), it's what keeps this cornbread nice and moist.  The buttermilk adds richness to the batter.  The higher fat, the better, but this time around, I actually didn't have buttermilk so I made my own using the skim milk I had available.  Take 15 tbsp milk and add 1 tbsp lemon juice and allow to sit for around 10 minutes to curdle.  This will work as a great substitute for the buttermilk.  The spices add fall flavor--it's not fall without nutmeg, cinnamon, and ginger.  Trust me, you will thank me later when your kitchen smells AMAZING!  The honey is in there to balance out the flavor.  It's not intended to be overly sweet.  2 tablespoons of honey should be more than enough.

First I mixed the dry ingredients with a whisk, to get out all the lumps.

Picture

Then the wet ingredients.

Picture

Then combine, mixing as little as possible.  You don't want to over mix or your dough will become dense.

Picture

Grease an 8x8 pan and bake for 25-30 minutes at 400 degrees F, or until a toothpick comes out clean.  It should be nice and golden brown on top.  This makes a great snack or breakfast with just a drizzle of honey on top.

Picture
Picture
the drizzle photo is something i'll have to work on--for now, you're stuck with this.

If you want to make a fall meal out of the cornbread (and who doesn't on an 84 degree day in September...), you can make a chili.  Now, due to many reasons not limited to and including that I am out of cumin, I didn't really make a chili who's recipe I'm proud enough to share.  When I'm not in the mood to eat my chili, I typically make some sort of variation of this chili recipe by Rachael Ray.  Sometimes I add meat, sometimes I don't.  What I love about her chili's are that she adds beer to them.  That's right.  BEER.  It adds a nice depth of flavor to the chili leaving your tastebuds going, hmmm....  So, in good fall fashion, I added pumpkin beer.  Because I caved at the store last week and was looking for a reason to pop open the 6-pack.  Why not for a chili to eat with my pumpkin cornbread?  Seems logical.  So using the few excuses for chili ingredients left in my fridge, I managed to scrounge something together and pictured below is the delicious fall (even though it's not fall yet) meal that I enjoyed.  I can only imagine how delicious this will be once it's actually chilly out.  

Picture


Pumpkin Cornbread

serves 16

Ingredients:

1/2 cup all purpose flour
1/2 cup wheat flour
1 tsp kosher salt
1/2 tsp cinnamon
1/4 tsp ginger
1/4 tsp nutmeg
1 cup cornmeal
1-1/2 tsp baking powder
1/2 tsp baking soda
2 eggs
1 cup canned pumpkin puree
1/4 cup canola oil
2 tbsp honey
1/4 cup buttermilk
(skim buttermilk works and was used in the nutrition analysis, but bread will be moister and richer with fattier buttermilk)
--
Nutrition:
Calories:  110, Fat:  4.6 g, Potassium:  92.9 g, Carbs:  15.2 g, Fiber:  2.0 g, Protein:  2.7 g
Instructions:


1.  Preheat the oven to 400 degrees F and grease an 8x8 baking pan with cooking spray.
2.   Combine all dry ingredients with a whisk.
3.  Combine all wet ingredients with a whisk.
4.  Combine wet and dry ingredients.  DO NOT OVER MIX.  Only mix ingredients until combined and that there are no dry pieces in the batter.  Over mixing will create a dense dough.
5.  Pour into pan and bake for 25-30 minutes, or until a toothpick comes out clean and top is golden brown.
6.  Allow to cool for 5-10 minutes before slicing.  Serve with chili or with a drizzle of honey.  Enjoy!!
Picture
Picture
0 Comments

I know what you're thinking... More tomatoes???

8/24/2014

0 Comments

 
Picture
Picture


Egg Stuffed Tomato


What is more perfect than a fried egg?  Pretty much nothing.  Think about it.  A perfectly fried egg has a soft, fluffy white with those crisp outer edges, and a perfectly gelled, yet still runny yolk.  And when you cut in to the egg?  Pure perfection.  The yolk runs all over the plate, covering the rest of your meal like a delicious sauce.  Why not take this little piece of perfection and stuff it inside a tomato?  

Honestly, I'm not sure why I haven't thought of this idea earlier--and, I can't take all the credit.  This morning, I was watching "The Kitchen" on Food Network and was inspired by this recipe created by Marcela Valladolid.  This tomato inspired episode of "The Kitchen" was full of amazing ideas but this one surly takes the cake.  I made a few swaps in my version of this recipe to lighten up the dish just a little bit, but the idea is the same.  You have salty, smokey turkey sausage (instead of chorizo) cooked with thinly sliced yukon gold potatoes stuffed inside a well seasoned tomato.  I used one of my farmers market tomatoes, however, I'd suggest using a meaty, beefy, beefsteak tomato as it stands up to baking better.  I like the creaminess and lightness the queso fresco adds to the dish.  Its a mild cheese that really adds a nice finish to the tomato.  I just use a tiny sprinkle.  And for a pop at the end, I squeeze on a little lemon juice and sprinkle with cilantro.

What are you waiting for?  Get cooking!  You can find my recipe below.  Each tomato comes in at around 300 calories with the cheese.  If you opt out of using cheese, your baked tomato will come in at around 250 calories.

INGREDIENTS:

(Serves 4)

4 beefsteak tomatoes
Salt and pepper
2 tsp extra virgin olive oil
1 cup yukon gold potatoes, cut into small cubes
6 ounces turkey sausage (or you could use chicken sausage)
4 large eggs
Queso fresco, for garnish
Cilantro, chopped, for garnish
1 lemon
DIRECTIONS:

Preheat the oven to 350 degrees F.

Slice off the top part of the tomatoes horizontally and scoop out the pulp and seeds. Season the tomatoes heavily with salt and pepper. (DO NOT throw away the flesh, save for another use!)

Heat the oil in a medium saute pan over medium-high heat. Add the potatoes and cook until crisp, about 6 minutes. Transfer the potatoes to a plate lined with a paper towel to drain off excess oil. Add the sausage to the pan and cook for about 3 minutes. Transfer the potatoes back to the pan with the chorizo. Keep cooking until the sausage is crisp, about 1-2 more minutes. Season to taste with salt and pepper. Remove from heat and drain off excess fat on a paper towel.

Divide the potato mixture evenly between the scooped out tomatoes. Crack one egg onto each of the tomatoes and season the egg with salt and pepper. Place the tomatoes in a baking dish and bake for about 25-30 minutes or until the egg whites are fully cooked. Crumble queso fresco on top and sprinkle with cilantro.  Squeeze a tiny dribble of fresh lemon juice over the tomato. Serve immediately.
0 Comments

Farmers Market Finds - Part 2

8/17/2014

0 Comments

 
So if you saw my post yesterday, I came home with an ABUNDANCE of fresh produce yesterday morning.  Since I just moved to Peoria, I don't know a lot of people here yet and so I've been occupying my free time doing one of my favorite things- cooking (eating is a close second--both hobbies are related).  So, see below for an update on some new recipes, and some quick tips on how to make the most out of your farmers market finds.  Most importantly, happy eating! 
 

#quickTip:  Keeping Herbs FRESH

Picture
So i got some awesome fresh herbs at the farmers market and I really want to make them last.  Here's a storage tip.  Take your herbs out of the packaging they came in, wrap in a paper towel, place in ziploc bag, and store in the fridge!  I like to label and date my bag to keep on top of how fresh my herbs are.


Purple Potato and String Bean Salad

Picture
Picture
Picture
Picture
So why purple potatoes, you might ask?  Well there isn't necessarily a specific reason, however they did look amazing at the farmers market, and who doesn't love the fun color?  One thing to keep in mind with these potatoes, or any produce, is that the deeper and richer the color, the more nutrients and health benefits that produce will have!  Compared to white potatoes, purple potatoes happen to be very rich in antioxidant phytochemicals--similar to those found in other powerhouse foods such as blueberries.  These antioxidants are most known for their immunity boosting and cancer fighting properties.  The best part about the potatoes is that they taste remarkably similar to their white fleshed counterpart, so sub them into any recipe you would normally use regular potatoes for a fun variation that adds a pop of color.

Serves 4

INGREDIENTS:
1 lb purple potatoes (or you could use red or yukon gold if you don't have purple)
2 cloves garlic, minced
1 tbsp fresh oregano, finely chopped
2 tsp extra virgin olive oil
1/2 lb of multicolored string beans (or regular green beans)
1/4 red onion, sliced thin
2 tsp brown mustard
4 tbsp extra virgin olive oil
4 tsp lemon juice
1 tbsp chives, minced
1 tbsp cilantro, finely chopped
1 tbsp flat leaf parsley, finely chopped
salt and pepper

INSTRUCTIONS:
Preheat the oven to 400 F and get a pot of water boiling.

Scrub the potatoes to remove any dirt and cut into quarters, lengthwise.  Mince the garlic and chop the oregano.  Toss the potatoes in the olive oil, garlic, and oregano.  Season with salt and pepper.  Spread out on a baking sheet and place in the oven for about 25 to 30 minutes.  Potatoes are done when they are fork tender.  

While the potatoes roast, trim your green beans.  Grab a steamer insert for your pot and put the green beans in that, then place over boiling water and steam for 3 minutes.  You don't want mushy green beans so do not steam any longer than 3 minutes.  Immediately after steaming the beans, shock them in a bowl of ice water to retain the bright color and nutrients of the beans.

Slice the red onion into very thin slices.  Feel free to use a mandolin if you'd like.  Chop up the fresh chive, cilantro, and flat leaf parsley.

To make the dressing, whisk mustard, lemon, and olive oil in a bowl.  Season with salt and pepper.  
Combine 1/2 the dressing with the green beans and onions and allow the flavor to absorb.

When potatoes are done, combine everything together in a bowl and add a little more dressing.  The potatoes will absorb the most flavor while they are still warm.  Feel free to add all the dressing or just a little bit more.  This can be done completely to taste!  The last step is to toss in all those fresh herbs you chopped.  

Enjoy a big bowl as a meal, or serve as a summer side dish with some grilled chicken or shrimp.

NUTRITION:
231 calories, 13.5 g fat, 27.5 g carbohydrate, 4.1 g fiber, 4.6 g protein


Zucchini Banana Muffins


So yesterday at the farmers market, I purchased a HUGE zucchini (probably 8 lbs).  Honestly, it was the size of a baby (and for those of you who were wondering, I named him Carl...).  So far, I've used less than a third of the zucchini to make 4 batches of my zucchini banana muffins.  These muffins are packed with spice and packed with flavor.  There's cinnamon, nutmeg and ground ginger in addition to dark chocolate chips and chopped walnuts.  For a little whole grain kick, I've used just a little bit of whole grain flour and the bananas add a little favor and tons of moistness to the recipe.   Click here for the recipe! 
  
Picture
Picture
Picture
0 Comments

do it yourself:  Homemade Burrito Bowls!

7/8/2014

0 Comments

 
Creating your own homemade burrito is easier than you might think.  The best part?  No recipe needed!  Provided here are the guidelines you need to bring Chipotle into your kitchen.  Not only will you save a significant amount of cash, but you'll save calories as well!  What are you waiting for, let's get cooking!

THE INGREDIENTS:


To make a homemade burrito bowl that will blow chipotle out of the water, you'll need a few key ingredients.  These ingredients are by no means mandatory and the idea is for you to mix and match what you like best, exactly as you would do when walking through the line at Chipotle!

1.  Rice (brown or white)
prepare according to package directions


2.  Protein
I like using beans and making my bowl vegetarian.  You could also add in grilled shrimp, chicken, shredded pork, or even steak!


3.  Cheese
Go for something crumbled or shredded.  If I opt to add cheese to my bowl, I love cotija cheese (it's like a Mexican style feta, super mild and super delicious).  You could also use monteray jack, pepper jack, or cheddar.


4.  Salsa
You could use a store bought salsa or create a homemade salsa.  Up to you!


5.  Grilled Corn
Place an ear of corn on the grill for about 15 minutes charring each side.


6.  Diced Vegetables
I love diced bell peppers, avocados, and tomatoes, but your options are literally endless.  


7.  Lettuce
I like shredded romaine for the crunch. Mix it up and try grilling your romaine.


8.  Citrus and Tobasco
I really like to dress my bowls.  I use lime juice and tobasco to keep it light and fresh.


9.  Extras:  Mango, Cilantro, Sour Cream, Jalapeno
Add any or all of this for a great flavor punch!


ASSEMBLING YOUR BOWL:


Pick as many or as few of the above ingredients and combine any way you like!  Pictured below is my bowl.  It has shredded lettuce, 1/2 an ear of grilled corn, 1/3 cup black beans, 1/2 cup brown rice, 1/2 cup diced tomatoes, 1/4 of a bell pepper, cilantro, minced jalapeno, lime juice and tobasco.  This bowl is one of my favorites to eat for a light lunch and it's vegan!  Try making your own bowls and you'll get addicted to the ability to create your own Chipotle style flavors in the comfort of your own kitchen.  

Share your bowl creations here in the comments section.  Happy eating!

Picture
0 Comments

Do it yourself- Nutbutter!

6/24/2014

0 Comments


The Project

So after work on Friday, I went to the store, bought a bunch of different nuts, and set out on a mission.  To experiment creating my own nutbutters.  I've recently become nutbutter obsessed, topping just about every possible breakfast with sunbutter (minus eggs... gross).  The thing is, for that tiny jar of nutbutter, it can be almost 8 dollars depending on the nut (i've seen cashew butter for 11.99!).  That's too much--it's way cheaper to do it yourself.  I wanted to try creating my own butters and my own flavor combinations and if we are being honest, I think I came up with some winning recipes.  I'll provide you with some tips and tricks for making the perfect nutbutter every time.

The Base Recipe

Ingredients:
2 cups roasted nuts 
1 teaspoon kosher salt
1.5 tbsp oil (i'd suggest a light color oil, that won't impart a specific flavor to the nutbutter--canola works great)
1.5 tbsp honey

Roasted Nuts- Preheat the oven to 350.  Roast nuts for 10 minutes.

Instructions:
Place nuts in the food processor.  Start blending until smooth.  In total will take about 10-12 minutes.  After your mixture is smooth and creamy (this will happen as you blend the nuts, and oils are released), add your flavorings.  Use the oil as needed to reach your desired texture / consistency.  

Tips and flavor Ideas

Tips:
  • Make sure you have a high quality food processor.  Mine is old and the blade is dull, so unfortunately, I was not able to reach the desired creamy texture I was hoping for as I could smell the motor of my food processor burning out for keeping it running for too long.  Be careful of this!
  • Roast the nuts yourself.  The oils will release faster this way and you'll create a creamier butter, faster.
  • Roast your nuts!  Roasting develops the flavor of the nuts.  
  • Create your own unique flavor combinations and add in any extras you want for crunch, flavor, or even a nutritional boost.
  • To make crunchy peanut butter, reserve around 1/2 cup of the nuts and blend in at the end.


Flavor Ideas:
  • Maple Chia Sunbutter
    Sunflower seeds, maple syrup instead of honey, add 1 tbsp chia seeds
  • Chocolate Pretzel Peanutbutter
    Peanuts, honey or agave syrup, 2 tbsp cocoa powder, 1/2 cup crushed pretzels
  • Vanilla Almond Espresso
    Almonds, honey, 1 tbsp instant coffee, 2 tsp vanilla extract
  • Honey Cashew
    Cashews, honey


Photos

Picture
Measuring the almonds before roasting in the oven
Picture
after about 1 minute
Picture
after about 3.5 minutes
Picture
after about 7 minutes--starts to stick to sides, resembles graham cracker crust. i promise, you're almost there!
Picture
a few minutes after this stage (with a good quality food processor) you should see the oils start to release and the butter will become creamy.
Picture
starting to form into a butter. almost there!
Picture
not as creamy as I would have hoped, but here it is! maple chia almond butter.
Picture
last step--enjoy! I like pretzels with my nutbutter.
0 Comments

    Rose K.

    My name is Rose and I'm always hungry.  Come take a bite out of life with me, and learn just how easy leading a quick, healthy and delicious lifestyle can be.

    Picture
    Picture

    Archives

    March 2015
    February 2015
    January 2015
    December 2014
    November 2014
    October 2014
    September 2014
    August 2014
    July 2014
    June 2014

    Categories

    All
    #60SecondSkinny
    Almondbutter
    Baking
    Bison
    Bread
    Breakfast
    Brunch
    Burger
    Chai Tea
    Chicken
    Chocolate
    #ChoppedChallenge
    Coffee
    Cookie
    Dessert
    Dinner
    Dips
    #DoItYourself
    Donut
    Enchiladas
    Fall
    FarmersMarket
    #FarmFresh
    Fresh
    Green Beans
    GroundMeat
    HealthBenefits
    Healthy Habits
    Holiday
    Homemade
    Italian
    Lunch
    MoneySaver
    National Nutrition Month
    NutButter
    Nuts
    PeanutButter
    Pesto
    #PizzaNight
    Potato
    Pumpkin
    Quick Bread
    QuickTips
    #RecipeRedux
    Salad
    Sauce
    Side
    Slow Cooker
    Snack
    Sponsored
    Summer
    Sunbutter
    Sweet Potato
    Tomato
    Turkey
    #UtilizingLeftovers
    Vegetarian
    Zucchini

    RSS Feed


Proudly powered by Weebly